
Managing Invoices
Enable Aggregated Invoices
Note: This feature is only available for B2B customers.
-
Search for the customer.
For details, see Searching Customers.
-
In the result list, click on the customer number you want to edit.
This displays the customer detail page.
-
Switch to the Customer data tab.
This expands the customer data section.
- Click Edit.
-
In the Common section, mark the checkbox Aggregate invoices and select an interval for the aggregation.
You can choose either Daily, Weekly or Monthly.
- Click Save to persist the changes.
Accessing Customer Invoices
-
Search for the customer.
For details, see Searching Customers.
-
In the result list, click on the customer number you want to edit.
This displays the customer detail page.
-
Click Invoices.
This expands the invoice section, which lists the invoices, aggregated invoices, and credit notes.
-
Click on the invoice number.
This opens the invoice details. Invoice positions are clustered by orders and shipping buckets. There are charges on shipping bucket level as well as on order level.
Figure 1. Invoice detail page 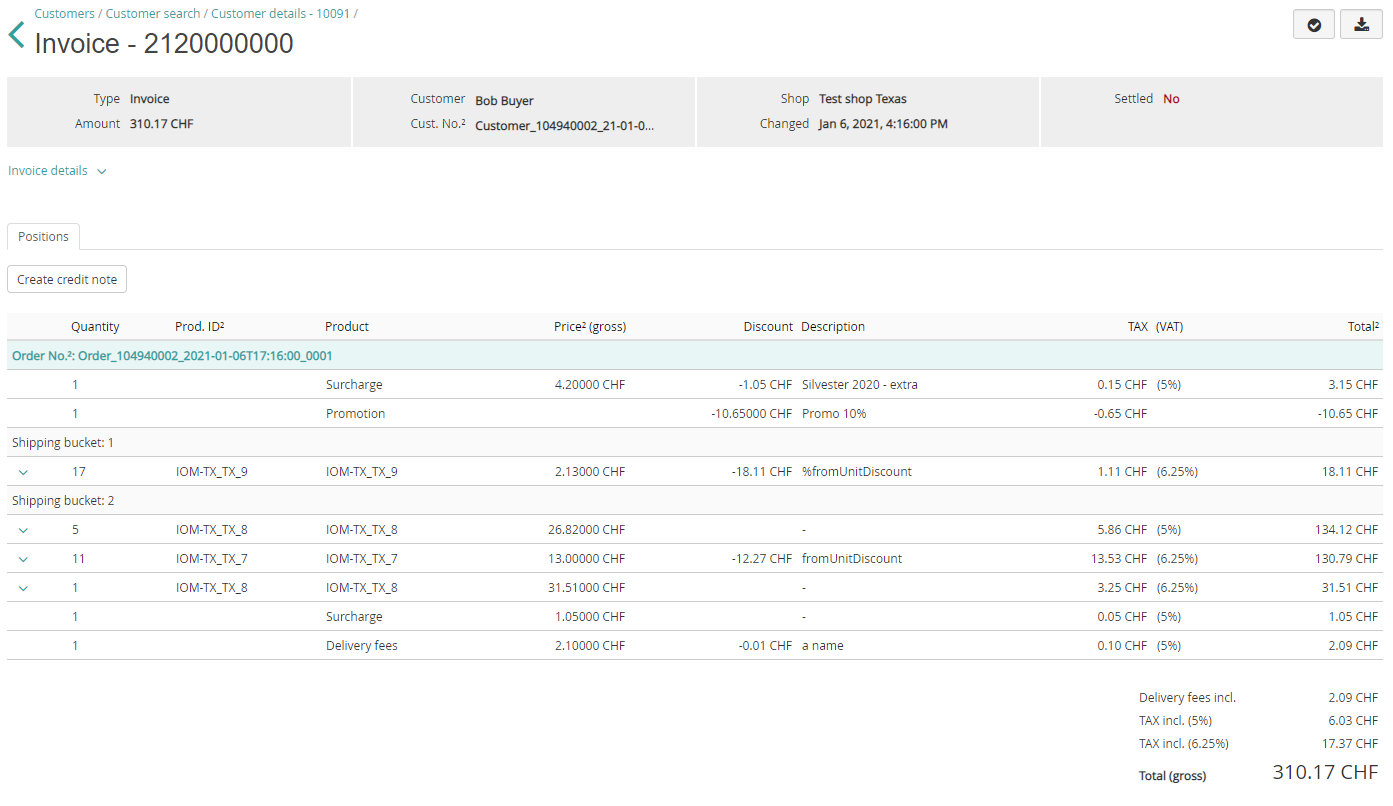
Downloading Customer Invoices
-
Search for the customer.
For details, see Searching Customers.
-
In the result list, click on the customer number you want to edit.
This displays the customer detail page.
-
Click Invoices.
This expands the invoice section, which lists the invoices, aggregated invoices, and credit notes.
-
Click the Download
 icon next to the intended invoice.
This prints the invoice into a PDF file and prompts you to download it.
icon next to the intended invoice.
This prints the invoice into a PDF file and prompts you to download it.
Marking Customer Invoices as Paid
-
Search for the customer.
For details, see Searching Customers.
-
In the result list, click on the customer number you want to edit.
This displays the customer detail page.
-
Click Invoices.
This expands the invoice section, which lists the invoices, aggregated invoices, and credit notes.
-
Click the
 icon next to the intended invoice.
This opens the Incoming Payment dialog.
icon next to the intended invoice.
This opens the Incoming Payment dialog. -
In the Incoming Payment dialog, edit the data as necessary.
Select at least a payment method and specify the paid amount. The default value is the complete invoice amount, which is also the maximum possible amount.
Figure 2. Saving payment information 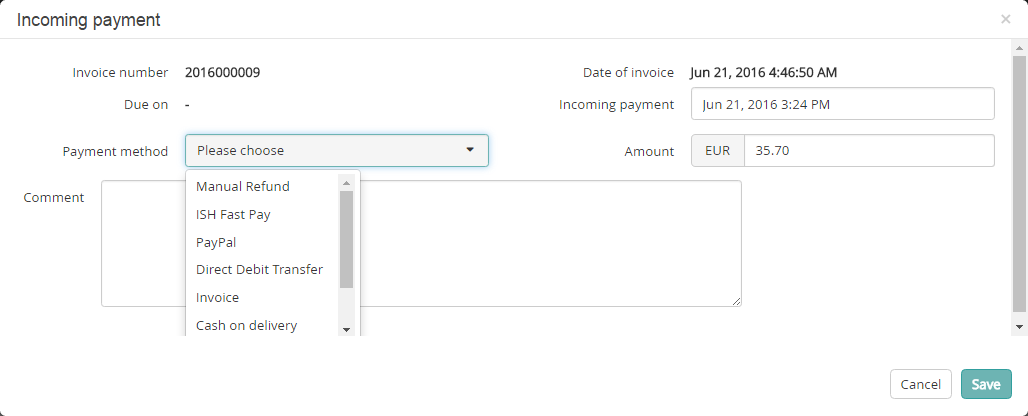
-
Click Save.
Otherwise, click Cancel to discard your settings.
Adding Credit Notes
-
Search for the customer.
For details, see Searching Customers.
-
In the result list, click on the customer number you want to edit.
This displays the customer detail page.
-
Click Invoices.
This expands the invoice section, which lists the invoices, aggregated invoices, and credit notes.
-
Click the invoice number.
This opens the invoice details.
-
In the Positions tab, click Create credit note.
This opens the credit note dialog. Credit note positions are clustered by orders and shipping buckets. There are charges on shipping bucket level as well as on order level.
Figure 3. Adding a credit note 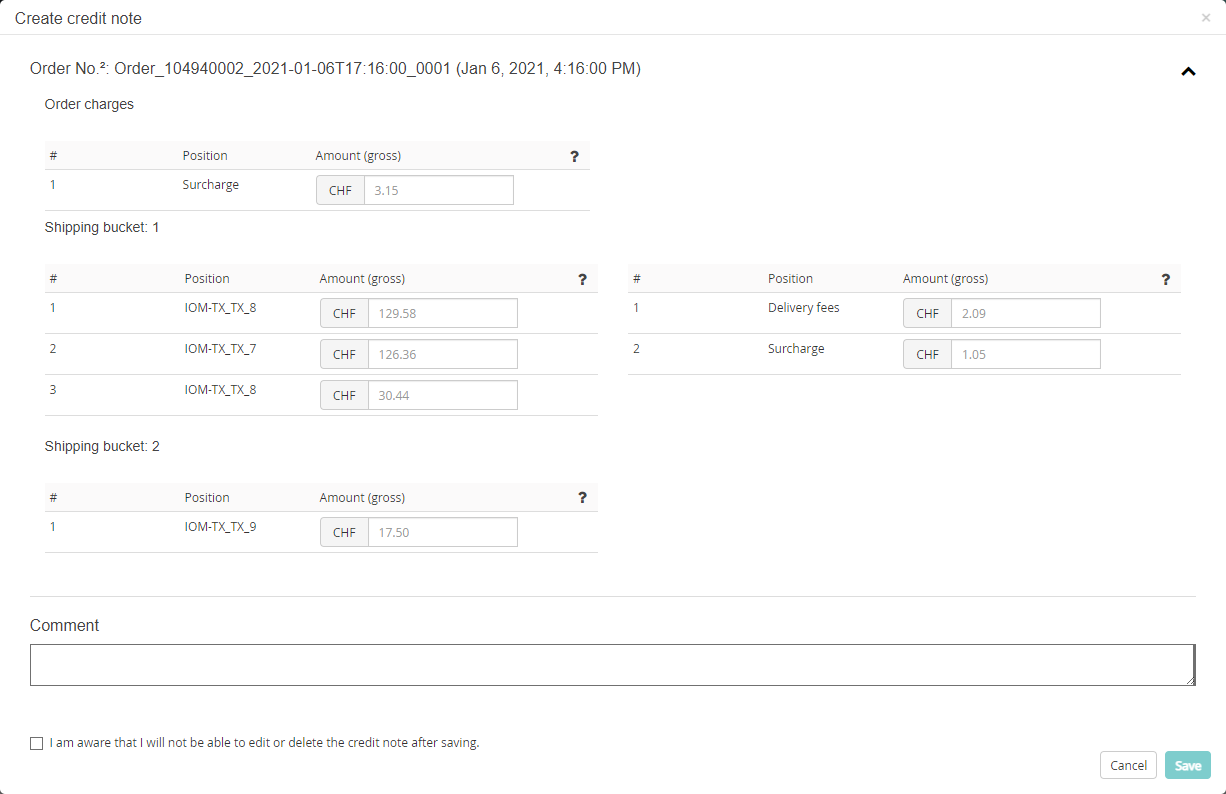
-
Specify the credit note details as necessary.
Specify the credit amounts for the respective invoice positions (ordered product, delivery fee, etc.). Optionally, leave a comment.
-
Select the checkbox to confirm your awareness that credit notes cannot be changed after saving.
This enables the Save button.
-
Click Save.
Otherwise, click Cancel to discard your settings.