
Managing Users
Viewing Users
-
In the navigation bar, select Admin.
This opens the Administration page.
-
On the Administration page, click User Management.
This opens the User Management page, which displays a list of users that you are allowed to manage in the given context.
Figure 1. Viewing Users 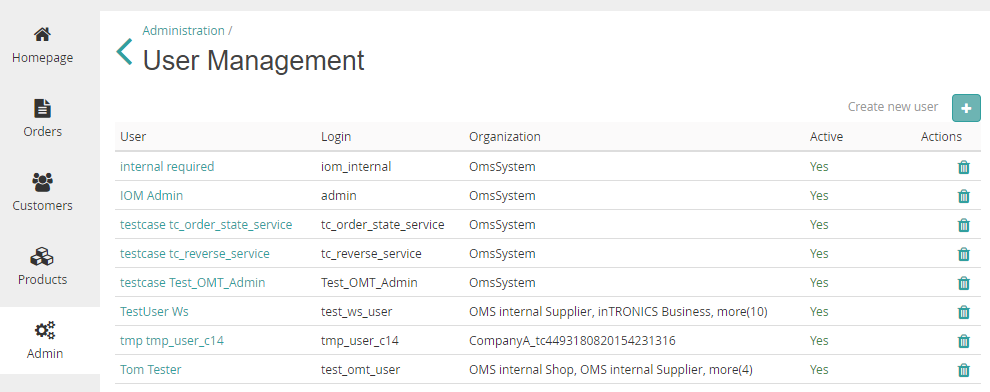
Creating Users
-
In the navigation bar, select Admin.
This opens the Administration page.
-
On the Administration page, click User Management.
This opens the User Management page.
-
On the User Management page, click the Create New User
 icon.
This displays the Create new user dialog.
icon.
This displays the Create new user dialog.Figure 2. Creating a new user 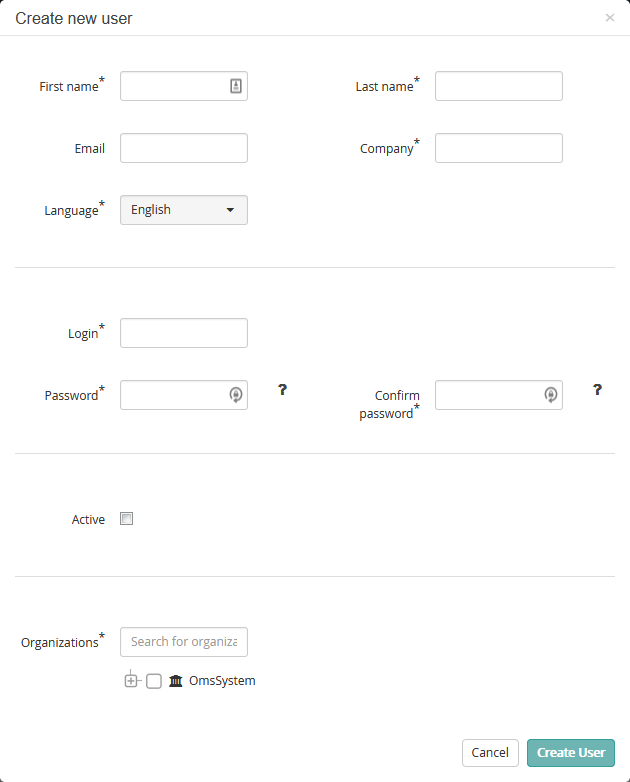 Note: The organization selection on this page defines the context(s) in which the user will be visible.
 -
Specify the user details as necessary, then click Create User.
Otherwise, click Cancel to discard your settings.
Editing User Details
-
In the navigation bar, select Admin.
This opens the Administration page.
-
On the Administration page, click User Management.
This opens the User Management page.
-
In the user list, click the name of the user you want to edit.
This opens the user detail view.
-
Open the User Details tab.
This displays the user's basic details.
-
Click the Edit
 icon.
This displays the editable data in edit boxes.
icon.
This displays the editable data in edit boxes.Figure 3. Editing user details 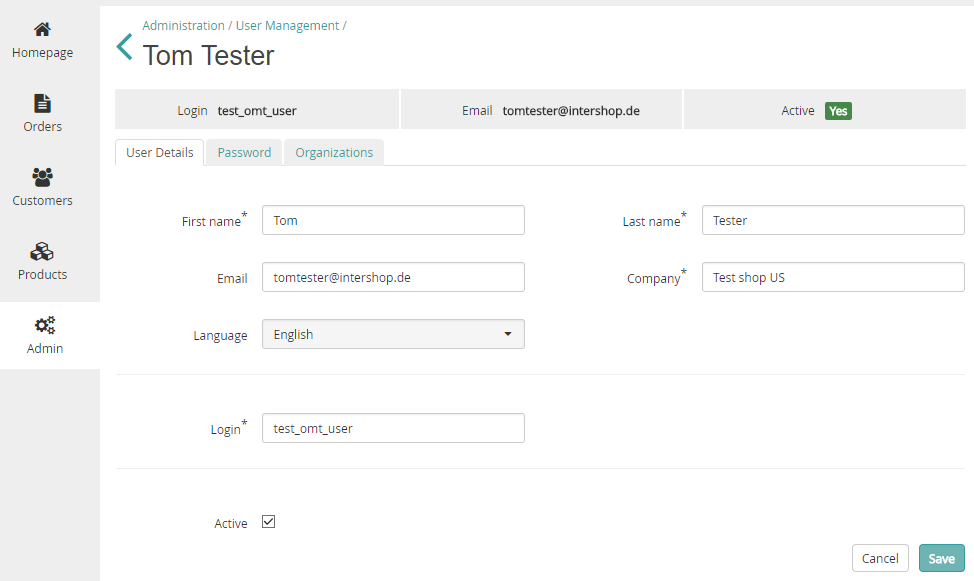
-
Modify the data as necessary, then click Save.
Otherwise, click Cancel to discard your settings.
Changing a User's Password
-
In the navigation bar, select Admin.
This opens the Administration page.
-
On the Administration page, click User Management.
This opens the User Management page.
-
In the user list, click the name of the user you want to edit.
This opens the user detail view.
-
Open the Password tab.
This opens the Change Password dialog.
Figure 4. Changing a user's password 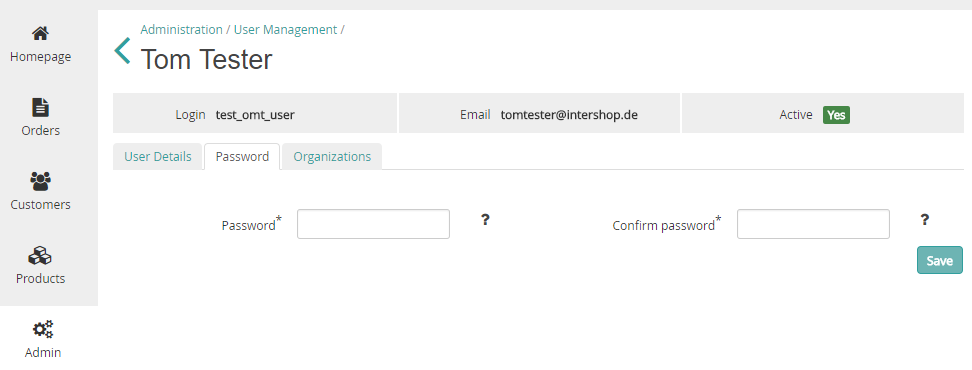
-
Specify the new password and confirm it in the corresponding field.
Click Save to complete the operation.
Managing Assignments to Organizations
-
In the navigation bar, select Admin.
This opens the Administration page.
-
On the Administration page, click User Management.
This opens the User Management page.
-
In the user list, click the name of the user you want to edit.
This opens the user detail view.
-
Open the Organizations tab.
This displays the organization tree.
-
To modify the organization assignments, click the Edit
icon.
This opens the Edit Assignments dialog.
Figure 5. Modifying a user's organization assignments 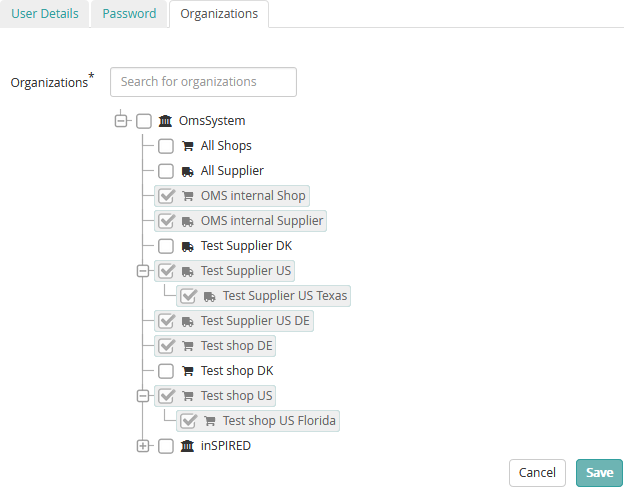
-
Select or deselect the checkboxes of the (sub)organizations you want to assign or unassign, respectively.
Implicitly assigned suborganizations (grayed out) cannot be deselected individually.
-
Click Save.
Otherwise, click Cancel to discard your settings.
Deleting Users
-
In the navigation bar, select Admin.
This opens the Administration page.
-
On the Administration page, click User Management.
This opens the User Management page.
-
In the user list, click the Delete
 icon in the row of the user you want to delete.
This opens a confirmation dialog.
icon in the row of the user you want to delete.
This opens a confirmation dialog. -
Click Delete to confirm the operation.
Otherwise, click Cancel.