
Managing Roles
Viewing Roles
-
In the navigation bar, select Admin.
This opens the Administration page.
-
On the Administration page, click Role Management.
This opens the Role Management page, which displays a list of all existing roles.
Figure 1. Viewing roles 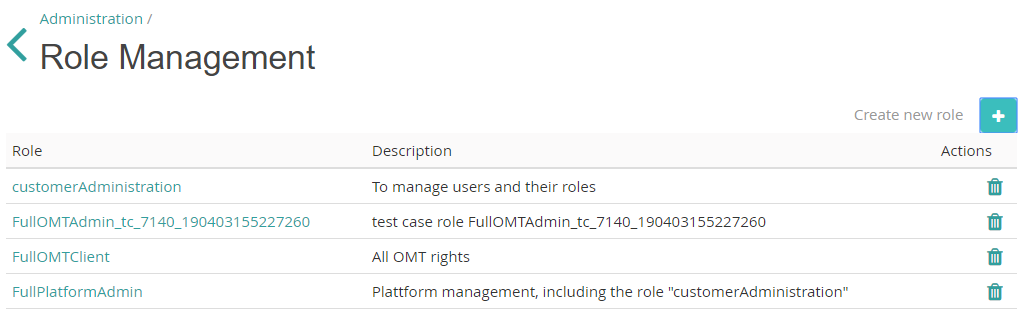
Creating Roles
-
In the navigation bar, select Admin.
This opens the Administration page.
-
On the Administration page, click Role Management.
This opens the Role Management page.
-
On the Role Management page, click the Create New Role
 icon.
This displays the Create new role dialog.
icon.
This displays the Create new role dialog.Figure 2. Create new role 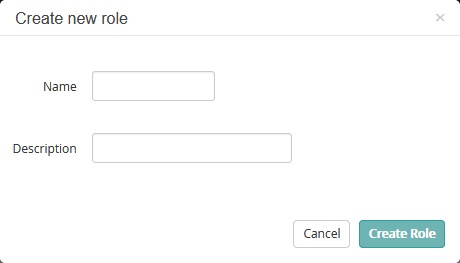
-
Specify the role details as necessary, then click Create Role.
Otherwise, click Cancel to discard your settings.
Editing Roles
-
In the navigation bar, select Admin.
This opens the Administration page.
-
On the Administration page, click Role Management.
This opens the Role Management page.
-
In the role list, click the name of the role you want to edit.
This opens the role detail view.
-
Open the Role Details tab.
This displays the role's name and description.
-
Click the Edit
 icon.
This displays the name and description in edit boxes.
icon.
This displays the name and description in edit boxes. -
Modify the data as necessary, then click Save.
Otherwise, click Cancel to discard your settings.
Controlling Role Permissions
-
In the navigation bar, select Admin.
This opens the Administration page.
-
On the Administration page, click Role Management.
This opens the Role Management page.
-
In the role list, click the name of the role you want to edit.
This opens the role detail view, which displays the list of all assigned permissions grouped by areas.
-
To modify the permission assignments, click the Edit
icon.
This displays the Edit permissions dialog.
Figure 3. Editing a role's permissions 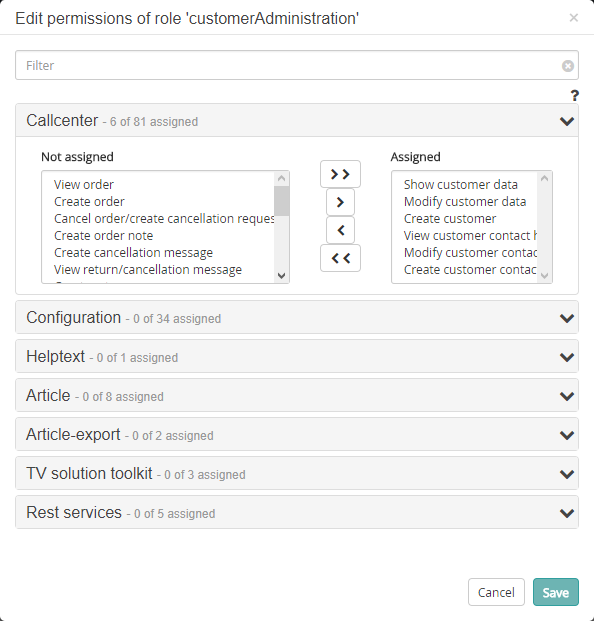
-
Assign/unassign the permissions to/from this role as required.
In every permission group section, select the intended permission(s) and click the intended arrow button to move the selected permission to the Assigned or Not assigned box, respectively.Tip: You can select multiple permissions at once using SHIFT-click or CTRL-click/CMD-click. In addition, you can search for specific permission names using the filter text box.
-
Click Save.
Otherwise, click Cancel to discard your settings.
Deleting Roles
-
In the navigation bar, select Admin.
This opens the Administration page.
-
On the Administration page, click Role Management.
This opens the Role Management page.
-
In the role list, click the Delete
 icon in the row of the role you want to delete.
This opens a confirmation dialog.Note: If the role is currently assigned to one or more users, the confirmation dialog lists these users.
icon in the row of the role you want to delete.
This opens a confirmation dialog.Note: If the role is currently assigned to one or more users, the confirmation dialog lists these users. -
Click Delete to confirm the operation.
Otherwise, click Cancel.