Creating New Scheduled Jobs
To create a new scheduled job:
-
In the Intershop System Management navigation bar, select Schedules | Scheduling.
A list of all schedules in the root domain is displayed.
-
Select the domain where you intend to create the schedule and click Apply.
A list of all schedules in the selected domain is displayed.
-
Click New.
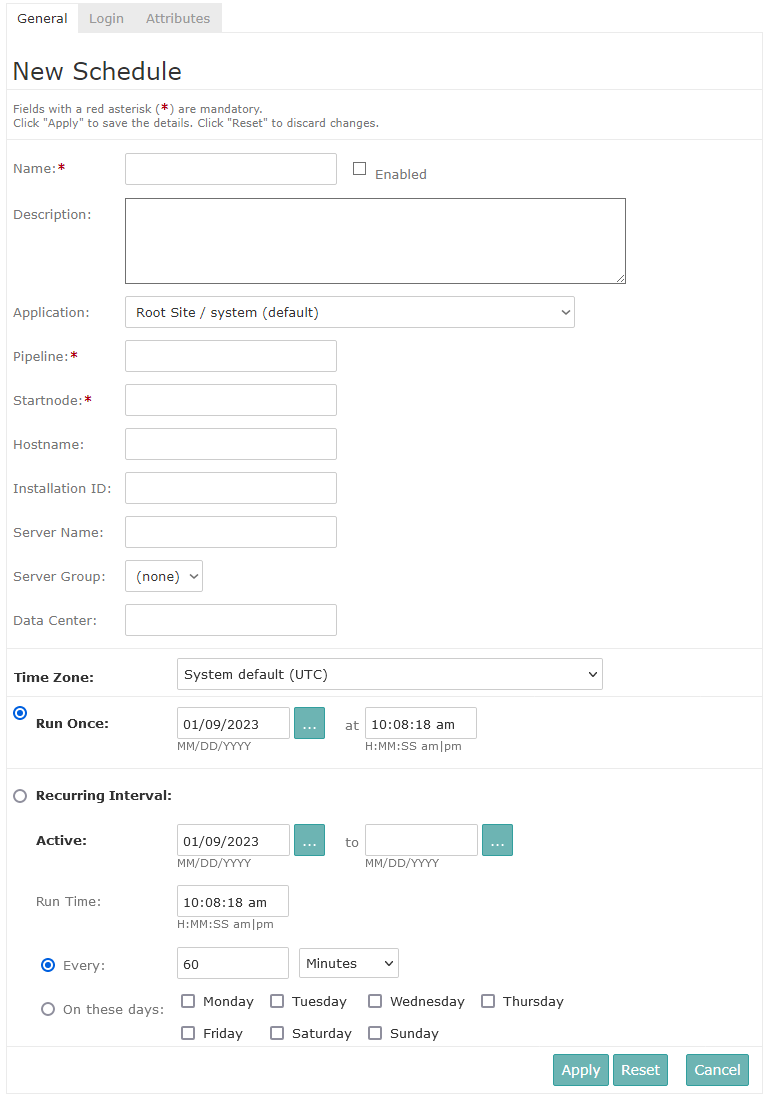
An empty schedule detail page is displayed.
Figure 1. Schedule detail page 
-
Enter all required information. The following table lists available fields:
Table 1. Schedule detail fields Field Description Name A unique name for the schedule. Duplicate entries are rejected. Description A description of the schedule. Enabled (checkbox) Select this checkbox to enable (activate) the schedule. Application Select the application where the scheduled pipeline will run. Pipeline The name of the scheduled pipeline. Start Node The start node of the scheduled pipeline. Host Name Specify the host where the scheduled pipeline will run. (If left blank, it may run on any host in the cluster.) Installation ID Specify the Intershop Commerce Management instance where the scheduled pipeline will run, e.g., ES1. The installation ID is stored in the intershop.properties file of the respective instance as the value of the property IS_INSTALLATION. If no ID is provided, the schedule can run in any instance in the cluster.Server Name Specify the application server where the scheduled pipeline will run. (If left blank, it runs on the application server where the automatic job processing is enabled.) Server Group Select the application server group where the scheduled pipeline will run. (If left blank, it runs in the default server group set for the application.) Data Center Specify, if applicable, the data center that the scheduled pipeline will use. Time Zone Select the time zone in which the newly created job is to be scheduled. Run Once (radio button) Select this option to run the schedule once. Recurring Interval (radio button) Select this option for the schedule to run at recurring intervals. Run Time Set the time when the schedule starts running. Active Set the period during which the specified recurring interval is active. Every (radio button) Select this option for the schedule to run at the specified recurrence pattern. On these days (radio button) Select this option for the schedule to run on the selected day(s). -
Click Apply to save your settings.
If you have activated the new scheduled job, it will run at the specified time in accordance with the selected time zone.
